Hitch covers are essential accessories that protect your hitch receiver from debris, weather elements, and rust. They also add style and uniqueness to your vehicle.
However, there may be instances where you need to remove the hitch cover. For example, you may need to clean it thoroughly, replace it with a new one or fix the damage underneath it.
It is essential to remove the hitch cover carefully and properly to avoid damaging both the hitch cover and the receiver. A damaged hitch cover not only looks unattractive but also exposes your receiver to harmful elements that may cause corrosion or rust.
Additionally, forcing the cover off without following proper procedures can lead to injury or damage to other parts of your vehicle. Therefore, this article provides step-by-step instructions on how to remove a hitch cover safely and effectively while providing tips on how best to maintain it once removed.
Tools Needed
Removing a hitch cover requires very few simple tools. Before starting the process, make sure you have the necessary items to facilitate the procedure.
The tools you’ll need will depend on the type of hitch cover you have, but most hitch covers require basic handheld tools. Here’s a list of commonly used tools for removing a hitch cover:
Screwdriver
A screwdriver is one of the most basic and essential tools you’ll need to remove a hitch cover. It comes in different shapes and sizes, so choose one that corresponds with your specific needs. A flat-head screwdriver or Phillips-head screwdriver may be required depending on the type of screws that are holding your hitch cover.
Pliers
Pliers come in handy when you need to grip or twist small objects like screws or bolts that are difficult to move with your fingers. They can be useful for turning any nuts, bolts, or fasteners that might be securing your hitch cover.
Socket Wrench Set
A socket wrench set is an ideal tool for those who want to avoid damaging their car’s paint while removing their hitch cover. Socket wrenches come with various sizes of sockets to fit different bolt heads. Use this tool cautiously so as not to overtighten any bolt after replacing its cap.
Hitch Pin Puller
Hitch pin pullers are available at most auto parts stores and are an excellent option if your trailer has quick-release pins holding its ball mount in place. They’re usually made from steel and can help remove the pins swiftly without causing any damage. Having all these tools will enable an easy removal process without tainting the protective coating on either your car’s paintwork or trailer’s metal surfaces during replacement after cleaning off dirt, grime, and rust accumulated over time on them

Preparation
Clearing the Area
Before beginning the removal process, it is important to make sure that the area around the hitch is clear and free from debris. This will allow for better visibility and access to the hitch cover, making it easier to remove. Check for any loose gravel or dirt that may get in your way during the process.
Once you are certain that the area is clear, use a clean cloth or towel to wipe down the surface of the hitch cover. This will help remove any dirt or grime that may have accumulated over time and make it easier to see any screws or bolts that need to be removed.
Gathering Tools
After preparing the area, gather all of the tools needed for removal. Depending on your specific hitch cover, you may need a screwdriver, pliers, wrenches, or other tools.
Make sure you have all the necessary tools before beginning so you do not have to stop midway through. It is also helpful to have some lubricant on hand in case any screws or bolts are difficult to loosen.
A good lubricant can help make removing these parts less strenuous and reduce damage potential depending on how stubborn they are. Preparing properly before starting will help ensure a seamless removal process without any hiccups along the way.
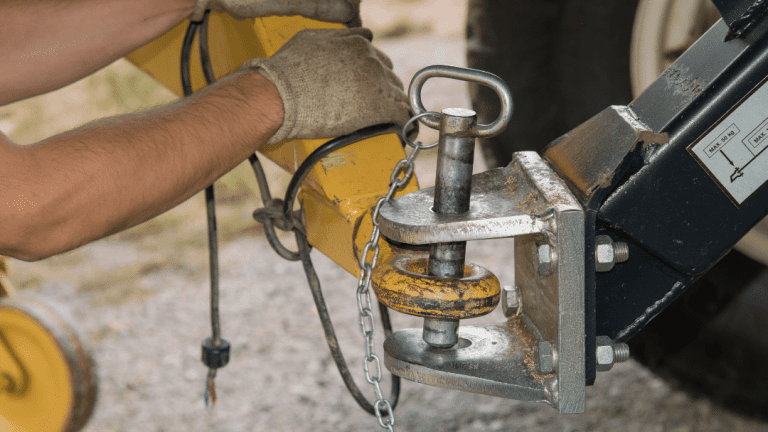
Removal Process
Step-by-Step Instructions
To remove a hitch cover, follow these step-by-step instructions: 1. Locate the screws that secure the hitch cover to the hitch.
These screws are usually located on either side of the hitch cover. 2. Use a screwdriver to unscrew each screw from its corresponding hole.
Make sure to turn the screwdriver in a counterclockwise direction. 3. If the screws are difficult to remove, try using pliers or an adjustable wrench to grip the head of each screw and turn it counterclockwise.
4. Once all screws have been removed, gently pull the hitch cover away from the hitch until it comes loose. 5. Place all screws and any other small parts in a safe place where they won’t get lost or damaged.
Precautions
While removing a hitch cover may seem like a straightforward process, there are several precautions you should take to avoid damaging either the cover or your vehicle’s hitch: 1. Be gentle when removing the hitch cover – pulling too hard or at an awkward angle could damage either component.
2. Always use caution when handling screws and other small parts – they can easily become lost or misplaced during removal. 3. If you encounter stubborn screws that won’t come loose, avoid using excessive force as this can strip their threads and make them impossible to remove without special tools.
Visual Aids
To help illustrate each step of this process, here is an example diagram showing how to remove a typical hitch cover: [Insert diagram here] By following these simple instructions and taking proper precautions during removal, you can safely and efficiently remove your vehicle’s hitch cover without causing any damage to your vehicle itself!
Troubleshooting Tips
Removing a hitch cover may seem like a simple task, but like any mechanical activity, it can present challenges. Here are some common issues and the recommended solutions for ensuring that the removal process goes smoothly:
Stubborn Screws
One of the most frustrating obstacles when removing a hitch cover is dealing with stubborn screws. Over time, screws can become rusted or corroded, making them difficult to remove.
Applying lubricant or penetrating oil can help loosen the screws. Letting the oil soak into the screw for several minutes before attempting to unscrew it can make all the difference in removing it successfully.
If a screw remains stuck after multiple efforts to loosen it, try increasing leverage by using a longer screwdriver or pliers. If all else fails and you cannot remove a stubborn screw, consider seeking professional help from an auto mechanic or handyman.
Rusted Parts
Rust is another issue that can prevent the easy removal of a hitch cover. When metal parts come into contact with moisture or water over time, they can begin to develop rust buildup which makes them difficult to remove. To break down rust buildup and make parts easier to handle during removal you will need vinegar (white) solution mixed with baking soda powder applied onto detached parts in order to dissolve any rust present on them.
Be careful not to apply too much pressure as this could cause damage and even lead to the breaking of some components which would require replacement. If you encounter significant rust buildup during your hitch cover removal process, consider purchasing replacement parts or taking your vehicle in for assistance from an experienced mechanic.
Maintenance and Cleaning
Once you have removed the hitch cover, it’s important to properly maintain and clean it to ensure its longevity. Over time, dirt, dust, and grime can accumulate on the surface of the hitch cover.
To clean a removed hitch cover, start by washing it with mild soap and water using a soft-bristled brush or cloth. Avoid using any abrasive cleaners or tools that could scratch or damage the surface.
After washing, rinse thoroughly with clean water to remove any soap residue. Dry with a soft cloth to prevent water spots from forming.
For stubborn stains or debris that won’t come off with soap and water alone, consider using a specialized cleaner designed for plastic or vinyl surfaces. Be sure to follow the manufacturer’s instructions carefully when using such products.
Replacement Options
In some cases, a hitch cover may be damaged beyond repair or simply to worn out to continue using. If this is the case, you’ll need to consider replacement options. There are many different types of hitch covers available on the market today in various shapes, sizes, and designs that can match your style preference.
Before purchasing a new hitch cover make sure the size matches your vehicle’s receiver tube opening otherwise it will not fit. You should also consider factors such as material type (plastic vs metal), finish (chrome vs powder-coated) durability, style before making your final decision.
A quality aftermarket replacement benefits from an improved design built with stronger materials that will last longer without needing constant maintenance. It may be worth spending extra money upfront on high-quality replacement covers instead of frequently replacing lower-quality options which would save you money long-term in addition to being more environmentally friendly than producing waste by disposing of worn-out plastic covers frequently.
Conclusion
Now that we have gone over the various steps involved in removing a hitch cover, let’s quickly recap the key points. Firstly, ensure that you have all the necessary tools before beginning the removal process. Secondly, take care to properly prepare for the removal by clearing any debris around the hitch and taking note of any specific techniques required for your particular hitch cover.
Thirdly, follow our step-by-step guide to ensure a smooth removal process. And finally, consider maintenance and replacement options to keep your hitch cover in good condition.