Yes, you can install a lift kit yourself. We will explore the process of installing a lift kit on your vehicle, including the necessary tools and steps involved.
Whether you are looking to improve off-road capabilities or enhance the aesthetics of your vehicle, installing a lift kit can be a rewarding diy project. However, it is important to approach this task with caution and ensure you have the necessary skills and knowledge.
By following the proper guidelines and taking the time to research, you can successfully install a lift kit and enjoy the benefits it brings.

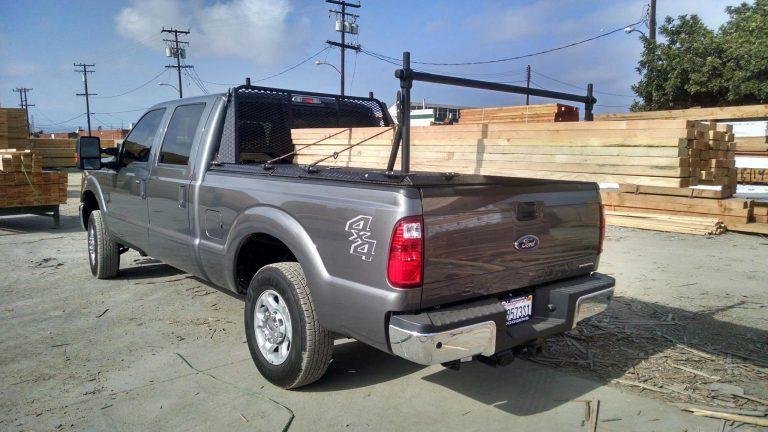
Credit: www.amazon.com
Understanding Lift Kits And Diy Installation Prospects
Installing a lift kit on your own is a viable option for many enthusiasts. With careful research, proper tools, and a step-by-step approach, diy installation can save you money and provide a rewarding experience.
Lift kits are popular vehicle modifications that raise the suspension height, providing additional ground clearance. Many off-road enthusiasts are intrigued by the idea of installing lift kits themselves, but is it a task suited for the average diy enthusiast? Let’s delve into what lift kits are, the benefits they offer, and the factors to consider before attempting a diy installation.
What Is A Lift Kit?
- Lift kits are aftermarket parts designed to elevate the height of a vehicle’s suspension.
- They consist of various components such as lift blocks, spacers, or extended shocks.
- A lift kit increases the distance between the vehicle’s frame and ground, allowing for larger tires and enhanced off-road capabilities.
- Lift kits come in various sizes, with each providing a different degree of lift to the vehicle.
Benefits Of Installing A Lift Kit:
- Improved off-road capabilities: A lift kit raises the suspension, allowing for increased ground clearance. This enables navigating rough terrains and obstacles with ease.
- Larger tire options: One of the main advantages of installing a lift kit is the ability to fit larger tires. This not only enhances the vehicle’s appearance but also provides better traction and stability.
- Enhanced visibility: By lifting the suspension, a lift kit improves the driver’s line of sight. This increased visibility can be beneficial when driving off-road or in low-visibility conditions.
- Better approach and departure angles: With a lift kit, the vehicle’s approach and departure angles improve, reducing the risk of bottoming out or damaging the undercarriage when encountering obstacles.
Factors To Consider Before Installing A Lift Kit:
- Vehicle compatibility: Lift kits are not universally compatible with all vehicles. It is crucial to ensure that the specific lift kit is designed for the make, model, and year of your vehicle.
- Technical expertise: Installing a lift kit requires a certain level of mechanical know-how. Assess your skill level and determine if you have the necessary tools and experience to tackle the installation.
- Warranty implications: Modifying your vehicle with a lift kit may void certain warranties. It is recommended to consult the manufacturer or dealership beforehand to understand the potential impact on your warranty.
- Alignment and handling adjustments: A higher suspension alters the vehicle’s center of gravity, affecting its alignment, steering, and overall handling. These issues should be considered and may require additional modifications.
- Safety considerations: Lift kits can affect the vehicle’s stability, braking performance, and overall safety. It is crucial to thoroughly understand the potential risks and take appropriate measures to ensure a safe driving experience.
Installing a lift kit yourself can be an ambitious project, but careful consideration of the aforementioned factors is essential. If you possess the necessary mechanical skills and are willing to invest the time and effort, a diy installation can be a rewarding experience.
However, for those with limited experience or concerns about vehicle warranties, seeking professional installation might be the optimal choice. Ultimately, the decision to install a lift kit yourself hinges on your comfort level and commitment to properly execute the task at hand.
Assessing Your Skills And Tools For Diy Lift Kit Installation
Assessing your skills and tools for a diy lift kit installation is essential before attempting it yourself. Ensure you have the necessary equipment and expertise to successfully complete the job without any complications.
If you’re wondering whether you can install a lift kit yourself, there are a few factors to consider. Assessing your skills and understanding the tools required for the job is crucial before embarking on this diy project. Let’s dive into the key points you need to know:
Self-Evaluation: Do You Have The Necessary Skills?
Before taking on the installation of a lift kit, it’s essential to honestly evaluate your mechanical skills. While some might enjoy tackling diy projects, others may feel more comfortable seeking professional help. Consider the following questions:
- Are you familiar with basic vehicle mechanics?
- Have you worked on suspension or drivetrain components before?
- Do you have experience using power tools and hydraulic lift systems?
- Are you comfortable following detailed instructions and diagrams?
If you answered yes to most of these questions, you likely have the necessary skills to complete a diy lift kit installation. However, if you lack experience in these areas or feel unsure, it may be wise to consult with a professional.
Tools Required For A Successful Diy Lift Kit Installation
To achieve a successful lift kit installation, you’ll need a specific set of tools. Having these tools on hand will enable you to complete the project smoothly and efficiently. Here are some essential tools required:
- Floor jack and jack stands: These will provide the necessary support and stability for lifting the vehicle.
- Air impact wrench: An air-powered impact wrench makes removing stubborn bolts much easier.
- Socket set: A wide range of socket sizes is needed to fit various bolts and nuts.
- Torque wrench: An essential tool for tightening bolts to the manufacturer’s specifications.
- Pry bar and hammer: These tools come in handy for removing old parts and aligning new components.
- Safety goggles and gloves: Protect yourself from potential hazards while working on your vehicle.
By ensuring you have the necessary tools readily available, you can save time and avoid frustration during the installation process.
Safety Measures And Precautions To Keep In Mind
Safety should be a top priority when attempting any diy automotive project, particularly one involving a lift kit installation. Here are some crucial safety measures to keep in mind:
- Work in a well-lit and properly ventilated area to minimize risks.
- Always wear safety goggles and gloves to protect your eyes and hands from debris and potential injuries.
- Make sure the vehicle is on level ground before lifting it with a jack.
- Use jack stands to support the vehicle securely once lifted.
- Follow the manufacturer’s instructions carefully and reference any diagrams provided.
- Take regular breaks and stay hydrated to avoid fatigue and maintain focus.
Remember, if you ever feel overwhelmed or uncertain during the installation process, seeking assistance from a professional is always a wise choice. Safety should never be compromised to save a few dollars.
With a clear assessment of your skills, the necessary tools on hand, and a focus on safety precautions, you’ll be better equipped to decide whether a diy lift kit installation is right for you.
Step-By-Step Guide For Installing A Lift Kit On Your Vehicle
Looking to install a lift kit on your vehicle? Wondering if it’s a diy project? This step-by-step guide provides all the information you need to know to successfully install a lift kit on your own.
Preparing Your Vehicle For Lift Kit Installation
- Inspect the vehicle: Before diving into the lift kit installation process, it is crucial to thoroughly inspect your vehicle to ensure it is suitable for a lift kit. Look for any existing damages or worn-out components that may need repair or replacement before proceeding further.
- Assemble the necessary tools and equipment: Gather all the tools and equipment required for the installation process. This may include a floor jack, jack stands, wrenches, sockets, ratchets, and a torque wrench. Make sure you have everything handy to avoid interruptions during the installation.
- Read the instructions: Familiarize yourself with the lift kit manufacturer’s instructions. Understanding the steps and requirements beforehand will help you navigate the installation smoothly. Take note of any specific guidelines or safety precautions mentioned.
Removing Old Suspension Components
- Lift the vehicle: Use a floor jack to lift the vehicle off the ground, ensuring it is securely supported by jack stands for added stability. This will allow you to access the suspension components that need to be removed.
- Remove tires: Take off the wheels to gain better access to the suspension components. This will make the removal process easier and provide ample space for the installation of the new lift kit components.
- Detach old suspension components: Begin by disconnecting the sway bar links, track bars, and shocks. Proceed to remove the springs, control arms, and any other components specified by the lift kit manufacturer. Follow the manufacturer’s instructions closely to avoid any mistakes.
Installing New Lift Kit Components
- Install new lift kit components: Begin by installing the new springs, control arms, and any additional components included in the lift kit. Ensure they are fitted correctly and securely tightened according to the manufacturer’s specifications.
- Reattach suspension components: After installing the new lift kit components, reattach the sway bar links, track bars, and shocks. Double-check that all connections are secure and tightened properly.
- Replace tires: Once the new lift kit components are in place, reinstall the tires and ensure they are properly tightened before lowering the vehicle back to the ground.
Adjustments And Alignments After Lift Kit Installation
- Perform alignment adjustments: After installing a lift kit, it is essential to have your vehicle’s alignment checked and adjusted if necessary. This will help ensure optimal handling, tire wear, and overall vehicle performance. Consult a professional alignment service or follow the lift kit manufacturer’s instructions for any alignment requirements specific to the kit.
- Check for clearance and functionality: Conduct a thorough inspection of your vehicle to ensure that the new lift kit components do not interfere with any other parts or systems. Verify that there is sufficient clearance for suspension travel and that all components are functioning correctly.
- Test drive and fine-tune: Take your vehicle for a test drive to gauge its performance after the lift kit installation. Pay attention to any abnormal noises, vibrations, or handling issues. Based on the test drive, make any necessary adjustments or tweaks to achieve the desired ride quality and performance.
By following these step-by-step instructions, you can install a lift kit on your vehicle with confidence. Remember to prioritize safety and refer to the manufacturer’s instructions throughout the process to ensure a successful installation.
Troubleshooting Common Issues During Diy Lift Kit Installation
Installing a lift kit yourself? Learn how to troubleshoot common issues during installation for a successful diy experience.
So, you’re thinking about installing a lift kit on your vehicle yourself? While it can be a rewarding project, there are a few common issues that you might encounter along the way. In this section, we’ll discuss some of these problems and provide tips on how to troubleshoot them effectively.
Understanding And Resolving Alignment Problems
Alignment problems can arise after installing a lift kit, causing your vehicle to veer to one side or experience excessive tire wear. Here are some common causes and solutions:
- Uneven suspension height: Ensure that all components of the lift kit are properly installed and adjusted to maintain consistent suspension height on both sides of the vehicle.
- Incorrect toe angle: Check the toe angle, which refers to the direction the tires point in relation to each other. Adjusting the tie rods can help correct any misalignment.
- Caster and camber issues: These angles affect steering stability and tire wear. If you notice steering difficulties or abnormal tire wear, consider consulting a professional to adjust the caster and camber angles.
Tackling Issues With Shocks And Struts
Problems with shocks and struts can cause a bumpy ride and affect your vehicle’s overall stability. Here’s what you can do to address these issues:
- Check for loose connections: Ensure that all bolts and fasteners securing the shocks and struts are properly tightened.
- Inspect for leaks: Look for any signs of leakage, which may indicate a damaged or worn shock or strut. If necessary, replace the faulty component.
- Verify correct installation: Make sure that the shocks and struts are correctly installed according to the manufacturer’s instructions. Improper installation can lead to performance issues.
Dealing With Suspension Noise After Lift Kit Installation
After installing a lift kit, it’s not uncommon to experience increased suspension noise. Here are a few things to consider:
- Check for loose components: Examine all suspension components, including control arms, sway bars, and bushings, for any signs of looseness. Tighten or replace any loose parts as needed.
- Lubricate bushings: Applying silicone or grease to the bushings can help reduce noise caused by friction.
- Evaluate exhaust clearance: Verify that the lift kit hasn’t interfered with the exhaust system, as contact between them can create noise. Adjust or add appropriate clearance if necessary.
Remember, if you encounter any issues during the installation process or are unsure about how to proceed, it’s always a good idea to seek professional assistance. Taking the time to troubleshoot and resolve common issues can ensure a smoother and more satisfying diy lift kit installation experience.
Expert Tips For A Successful Diy Lift Kit Installation
Looking to install a lift kit yourself? Check out these expert tips to ensure a successful diy installation. With careful attention to detail and following the guidelines, you can confidently take on this project and enhance your vehicle’s performance.
Installing a lift kit to elevate your vehicle’s height and improve off-road performance can be an exciting diy project. While it may seem daunting at first, with the right knowledge and preparation, it is definitely possible to install a lift kit yourself.
To ensure a successful installation, here are some expert tips that you should keep in mind:
Researching And Choosing The Right Lift Kit For Your Vehicle:
- Familiarize yourself with different types of lift kits, such as body lift kits and suspension lift kits, and determine which one suits your needs.
- Research various brands and models to find a high-quality lift kit that is compatible with your specific vehicle make and model.
- Consider important factors like lift height, ease of installation, and the type of terrain you primarily drive on.
Following The Manufacturer’S Instructions:
- Carefully read and understand the manufacturer’s instructions that come with the lift kit. These instructions are specific to the kit you purchased and will guide you through the installation process.
- Ensure that you have all the necessary tools and equipment mentioned in the instructions before you begin.
- Take note of any safety precautions or warnings mentioned by the manufacturer to avoid accidents or damage to the vehicle.
Enlisting The Help Of A Friend Or Experienced Diyer:
- Having an extra pair of hands can be extremely valuable during the installation process. Consider asking a friend or acquaintance who has experience with diy projects or has previously installed a lift kit on their own vehicle for assistance.
- If you do not have anyone to help you, joining online forums or communities dedicated to car enthusiasts can provide you with valuable advice and guidance from experienced individuals who have successfully installed lift kits themselves.
Importance Of Professional Assistance In Complex Installations:
- Keep in mind that some lift kit installations may require advanced mechanical skills or specialized knowledge. If you are unsure or lack experience with complex installations, it is recommended to seek professional assistance.
- Complex installations may involve modifications to the vehicle’s suspension system, such as relocating or extending brake lines, modifying steering components, or adjusting the drivetrain.
- Professional mechanics have the expertise and specialized tools necessary to handle these complex tasks, ensuring your safety and the integrity of your vehicle.
Regular Maintenance And Inspection After Lift Kit Installation:
- Once you have successfully installed the lift kit, it is crucial to perform regular maintenance and inspections to ensure its continued performance and safety.
- Regularly inspect all components of the lift kit, including bolts, struts, and shock absorbers, for signs of wear or damage.
- Follow the manufacturer’s recommended maintenance schedule for any necessary adjustments or replacements.
- Pay attention to the vehicle’s handling and performance, and seek professional assistance if you notice any issues or abnormalities.
With proper research, careful adherence to instructions, and support from experienced individuals (if necessary), installing a lift kit yourself can be a rewarding and enjoyable experience. Just remember to prioritize safety and follow all guidelines for a successful diy project.
Happy lifting!
Frequently Asked Questions Of Can I Install A Lift Kit Myself?
Is It Worth Installing A Lift Kit Yourself?
Installing a lift kit yourself can be worth it. It saves money and allows customization. With proper research and tools, you can easily install it at home. It gives you a sense of accomplishment and satisfaction. However, take caution, as it can be challenging and time-consuming.
It may require mechanical knowledge and specialized equipment. Be prepared for unforeseen challenges and additional costs. Always follow the manufacturer’s instructions and take safety precautions. Keep in mind that improper installation can cause damage or create safety hazards. Consult with a professional if you have any doubts or lack experience.
In summary, if you have the skills and resources, installing a lift kit yourself can be a rewarding and cost-effective option.
How Hard Is It To Put A Lift Kit On Yourself?
Installing a lift kit yourself can be challenging, but with the right tools and knowledge, it’s doable. The difficulty level may vary depending on your mechanical skills and the complexity of the kit. Prior experience may make the process easier.
Familiarize yourself with the instructions provided by the manufacturer, and make sure you have all the necessary tools and equipment. It’s crucial to follow the instructions carefully and take safety precautions during the installation. Keep in mind that mistakes can lead to suspension problems and other issues.
If you’re unsure about your abilities or lack the necessary tools, it’s advisable to seek professional help. Proper installation ensures optimal performance and avoids potential damage to your vehicle.
How Much Labor Does It Take To Install A Lift Kit?
The amount of labor required to install a lift kit varies depending on the vehicle and the complexity of the kit. Installation typically takes between 6 to 10 hours. It’s important to note that this timeframe may vary depending on the expertise of the mechanic and any unforeseen complications.
The process involves disassembling the suspension components, installing the new lift components, and reassembling the suspension. This includes installing new shocks, springs, and other components needed to accommodate the lift. It is recommended that the installation be carried out by a professional mechanic with experience in lift kit installations to ensure proper fitment and safety.
What Is Needed To Install A Lift Kit?
Installing a lift kit requires a few key components. First, you’ll need the lift kit itself, which includes the necessary hardware and components to lift your vehicle. Additionally, you’ll need basic hand tools such as wrenches, sockets, and a jack.
It’s important to have access to a sturdy jack stand to ensure your safety. You may also need coil spring compressors if your lift kit includes new springs. It’s essential to have a clear and level workspace that provides enough room to work comfortably under your vehicle.
Lastly, it’s recommended to have a comprehensive set of instructions specific to your lift kit, as well as some mechanical knowledge or experience to ensure a proper installation. By following these guidelines and taking necessary precautions, you can successfully install a lift kit on your vehicle.
Conclusion
Installing a lift kit on your own can be a challenging but rewarding project. With the right tools, knowledge, and patience, it is certainly possible to successfully complete the installation. However, it is important to remember that lift kit installation requires a certain level of mechanical expertise and understanding of your vehicle’s suspension system.
It is crucial to follow all instructions carefully and seek professional help if needed. Hiring a qualified mechanic can save you time, money, and potential risks. Additionally, by consulting with experts, you can ensure that the lift kit is properly installed, minimizing any potential issues in the future.
Ultimately, the decision to install a lift kit yourself depends on your level of skill and confidence. So if you feel up to the challenge, go ahead and embark on this exciting project!