It takes an average of 1-3 hours to install a hitch. Installing a hitch on your vehicle is a relatively quick process, typically taking between 1 to 3 hours.
Having a professional technician or mechanic install the hitch can ensure that it is properly fitted and securely attached to your vehicle’s frame. The installation process involves positioning the hitch under the vehicle, securing it in place, and wiring any necessary electrical connections.
The exact time taken can vary depending on the make and model of your vehicle, as well as the complexity of the hitch installation. It is recommended to consult a professional for an accurate estimate and to ensure a proper and safe installation.

Credit: www.edmunds.com
Understanding The Hitch Installation Process
Installing a hitch may take anywhere from 30 minutes to a few hours depending on the type of vehicle and the experience of the person handling the installation. The process involves attaching the hitch receiver, mounting hardware, and wiring harness, ensuring a secure and efficient setup for towing needs.
If you’re planning to install a hitch on your vehicle, it’s important to understand the overall installation process. Installing a hitch involves several factors, and it’s essential to recognize the key elements that can impact the time it takes to complete the installation.
Additionally, considering the importance of professional installation is crucial. So, let’s dive into the details and explore these aspects further.
Factors Affecting Installation Time
- Vehicle type: Different vehicles have different designs, which can directly affect the ease and speed of hitch installation. Factors such as the frame structure, bumper style, and exhaust placement can influence installation time.
- Hitch type: There are various types of hitches available, including receiver hitches, gooseneck hitches, and fifth-wheel hitches. The complexity and specific requirements of each hitch type can impact the installation time.
- Wiring requirements: If your hitch installation involves wiring for trailer lights or accessories, it can add additional time to the overall process. Wiring tasks such as connecting the electrical system, ensuring proper grounding, and testing can be time-consuming.
- Experience and skill level: The experience and skill level of the installer can significantly affect the installation time. A professional who specializes in hitch installation will likely be more efficient and knowledgeable, leading to a quicker and more precise installation.
- Equipment availability: Having the necessary tools and equipment readily available can save time during the installation process. If tools need to be sourced or if specific equipment is lacking, it can prolong the overall time required.
Importance Of Professional Installation
While some individuals may opt for a diy approach to save money, professional installation can offer several advantages. Here’s why choosing professional installation is important:
- Expertise and precision: Professionals have the knowledge and experience to handle various hitch installation scenarios. They can ensure proper alignment, secure attachment to the vehicle’s frame, and adhere to safety standards.
- Time-saving: Professional installers are familiar with the process, allowing them to complete the installation efficiently. Their expertise and access to specialized tools can save you valuable time.
- Warranty protection: Many hitch manufacturers offer warranties, which may require professional installation to remain valid. By choosing professional installation, you can ensure compliance with warranty terms and have peace of mind.
- Safety assurance: A properly installed hitch is crucial for safe towing. Professional installers follow industry guidelines, ensuring all necessary safety measures are in place.
- Compliance with regulations: Professional installers are aware of local, state, and federal regulations regarding hitch installation. By utilizing their services, you can ensure adherence to all relevant requirements.
Now that you have a better understanding of the hitch installation process and the factors that may affect installation time, you can make an informed decision on how to proceed. Whether you choose the diy route or opt for professional installation, prioritize safety and precision to enjoy worry-free towing experiences.
Step-By-Step Guide: Installing A Hitch
Installing a hitch is a step-by-step process that can vary in duration depending on your experience and the type of vehicle. On average, it takes around 1-2 hours to complete the installation, but this can be longer if complications arise.
Following the instructions carefully and having the necessary tools can help expedite the process.
So you’ve decided to install a hitch on your vehicle, but you may be wondering, how long does it take? Well, the installation process can vary depending on your experience level and the type of vehicle you own. In this step-by-step guide, we’ll walk you through the process of installing a hitch, from gathering the necessary tools and materials to preparing your vehicle and finally, installing the hitch.
Gathering The Necessary Tools And Materials:
- Hitch kit: Make sure you have the appropriate hitch kit for your vehicle.
- Socket set: A socket set with various socket sizes will come in handy.
- Torque wrench: This tool will help you ensure that the hitch is properly tightened.
- Screwdriver: Have a screwdriver on hand for any necessary adjustments.
- Wire brush: A wire brush will be useful for cleaning any rust or debris from the vehicle’s frame.
Preparing The Vehicle For Installation:
- Remove the undercarriage panel, if applicable, to access the vehicle’s frame.
- Inspect the frame for any rust, debris, or obstacles that may hinder the installation process.
- Clean the frame using a wire brush to remove any rust or debris, ensuring a secure hitch attachment.
Installing The Hitch Onto The Vehicle:
- Align the hitch with the mounting holes on the vehicle’s frame.
- Insert the hitch bolts through the mounting holes, ensuring they are inserted in the correct order as specified in the hitch kit instructions.
- Tighten the hitch bolts using a socket set and torque wrench, following the recommended torque specifications provided in the hitch kit instructions.
- Double-check that all the bolts are properly tightened.
- Reattach the undercarriage panel, if applicable.
Installing a hitch may require some physical strength and the help of a friend, especially when lifting and aligning the hitch. It’s important to take your time during the installation process and follow the manufacturer’s instructions carefully.
By following this step-by-step guide, you’ll be able to install a hitch onto your vehicle efficiently and securely. Remember, if you’re unsure about any steps during the installation process, it’s always best to consult a professional to ensure the hitch is installed correctly.
Now that you’re equipped with the necessary knowledge and tools, why not give it a try? Installing a hitch can expand the capabilities of your vehicle and open up a world of possibilities for outdoor adventures. Happy hitch installing!
Factors That Impact Installation Time
Installation time for a hitch depends on several factors, such as the type of vehicle, the complexity of the installation process, and the experience of the installer.
Installing a hitch can vary in time depending on several factors. The type of hitch and its installation complexity, vehicle-specific considerations, and the role of experience all play a role in determining how long the installation process will take. Let’s take a closer look at each of these factors:
Types Of Hitches And Their Respective Installation Complexities:
- Rear receiver hitches: These hitches are the most common type and are typically installed under the vehicle’s rear bumper. The installation process involves removing the rear bumper and securely attaching the hitch to the vehicle’s frame.
- Front-mount hitches: Unlike rear receiver hitches, front-mount hitches are installed on the front of the vehicle. They may require more extensive modifications to the vehicle’s front end, such as removing parts of the grille or bumper.
- Fifth-wheel hitches: These hitches are designed for towing heavy trailers and require careful installation onto the bed of a pickup truck. They involve bolting the hitch to the truck’s frame and often require additional reinforcement for added stability.
Vehicle-Specific Considerations For Hitch Installation:
- Frame design: The design of the vehicle’s frame can impact the installation process. Some frames may have dedicated mounting points, making installation quicker and easier, while others may require additional modifications.
- Exhaust system: The location and configuration of the vehicle’s exhaust system may affect the installation process. It may be necessary to make adjustments or reroute the exhaust to accommodate the hitch.
- Wiring and lighting connections: Depending on the vehicle’s electrical system, wiring connections for trailer lights and brakes may need to be set up during the hitch installation. This can add extra time to the process.
The Role Of Experience In Reducing Installation Time:
- Familiarity with the vehicle: Experienced hitch installers often have prior knowledge and experience working with a variety of vehicle makes and models. This familiarity allows them to streamline the installation process and anticipate any potential challenges.
- Efficient workflow: Seasoned installers have developed efficient workflows and techniques to expedite the installation process. They know the steps involved and can minimize time spent on each task.
- Troubleshooting skills: In the event of any unexpected issues or complications, experienced installers are better equipped to problem-solve and find solutions quickly. This reduces overall installation time.
Overall, the installation time for a hitch can vary depending on factors such as the hitch type, vehicle-specific considerations, and the installer’s experience. By understanding these factors, you can have a better idea of what to expect when getting a hitch installed on your vehicle.
Hitch Installation Services: Pros And Cons
Installing a hitch can take anywhere from 1 to 3 hours, depending on the experience of the installer and the complexity of the vehicle. While professional installation services offer expertise and convenience, diy installation can save money and allow for customization.
Consider your options based on time, budget, and skill level.
If you are considering installing a hitch on your vehicle, you have a couple of options to choose from. You can hire a professional installer to take care of it for you or you can go the diy route and tackle the installation yourself.
Both options have their pros and cons, so let’s take a closer look at each.
Hiring A Professional Installer For Convenience And Expertise:
- Convenience: Hiring a professional installer can save you time and effort. You can simply drop off your vehicle and let the experts handle the installation for you. This is especially beneficial if you have a busy schedule or lack the necessary tools and equipment.
- Expertise: Professional installers have the necessary knowledge and experience to ensure a proper installation. They are familiar with different hitch models and can provide advice on the best option for your specific needs. Their expertise can help prevent any potential mistakes or issues down the road.
- Warranty: Many professional installers offer warranties on their work. This provides peace of mind knowing that you are covered if anything goes wrong with the installation. It also shows the confidence they have in their own workmanship.
Diy Installation: The Pros And Cons Of Doing It Yourself
- Cost savings: One of the biggest advantages of diy installation is the potential cost savings. By doing it yourself, you eliminate the labor costs associated with hiring a professional installer. However, it’s important to note that you may still need to invest in the necessary tools and equipment.
- Learning experience: Installing a hitch yourself can be a valuable learning experience. It allows you to familiarize yourself with your vehicle and gain hands-on knowledge. This can come in handy for any future diy projects or maintenance tasks.
- Control and customization: When you install the hitch yourself, you have complete control over the process. You can choose the exact hitch model and customize it to your preferences. This level of control may be important to those who have specific towing needs or want a unique setup.
- Time and effort: Diy installation can take time and effort, especially if you are not familiar with the process. It may require research, watching tutorials, and following detailed instructions. Additionally, if you encounter any issues or complications during the installation, you will need to troubleshoot and find solutions yourself.
Deciding whether to hire a professional installer or go the diy route for hitch installation depends on various factors such as your time availability, budget, and comfort level with diy projects. Both options have their own set of advantages and disadvantages.
Evaluate your specific needs and capabilities to make an informed decision.
Top Tips For A Quick And Efficient Hitch Installation
Installing a hitch doesn’t have to be time-consuming. Follow these top tips to ensure a quick and efficient installation process.
Planning Ahead And Organizing The Installation Process
- Before starting the hitch installation, it’s essential to plan and organize the process. This ensures a smooth and efficient installation experience. Here are some tips to help you in this regard:
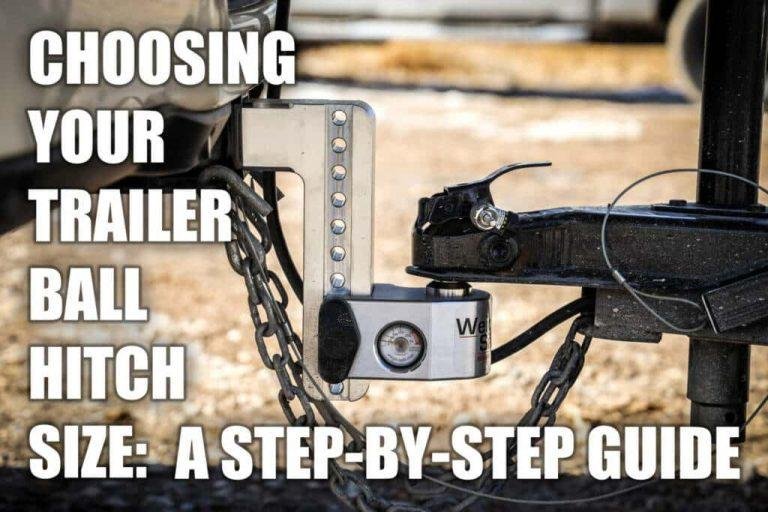
- Take measurements: Begin by measuring your vehicle’s frame and determining the appropriate hitch size and weight capacity. This will ensure that you select the right hitch for your needs.
- Gather necessary tools: Make a checklist of all the tools required for the installation. This may include wrenches, socket sets, torque wrenches, and wire cutters. Having all the tools handy will prevent unnecessary delays during the installation process.
- Clear the workspace: Ensure that the area where you’ll be working is clean and clutter-free. Removing any obstacles or distractions can help you focus and complete the installation more efficiently.
- Read the instructions: Familiarize yourself thoroughly with the manufacturer’s installation instructions. This will provide you with valuable insights into the process and any specific requirements for your hitch model.
- Create a step-by-step plan: Break down the installation process into smaller steps and create a plan to follow. Having a roadmap will help you stay organized and ensure that you don’t miss any crucial steps.
Following Manufacturer Instructions And Guidelines
- To ensure a successful hitch installation, it is crucial to adhere to the manufacturer’s instructions and guidelines. Here’s why this is important:
- Safety: Manufacturers provide specific instructions to ensure the hitch is installed correctly and safely. Following these guidelines reduces the risk of accidents or damage to your vehicle.
- Warranty: Deviating from the manufacturer’s instructions may void your warranty. To protect your investment, it’s essential to follow the recommended installation procedures.
- Proper fit and functionality: The manufacturer’s instructions provide detailed steps to ensure the hitch is installed correctly, ensuring a proper fit and optimal functionality.
- Avoiding mistakes: Manufacturers often include warnings about common installation mistakes. By following their instructions, you can avoid these errors and ensure a smooth installation process.
Utilizing Online Resources And Tutorials For Guidance
- While the manufacturer’s instructions are essential, you can also utilize online resources and tutorials to supplement your knowledge. Here’s how they can help:
- Video tutorials: Online platforms like youtube offer a wide range of hitch installation tutorials. These videos provide visual guidance, making it easier to understand the steps involved.
- Discussion forums and communities: Joining online forums related to hitch installation can be helpful. Here, you can seek advice from experienced individuals who have already installed hitches and learn from their experiences.
- Blogs and articles: Many websites offer detailed articles and blog posts on various aspects of hitch installation. These resources can provide additional insights, tips, and tricks to ensure a smooth and efficient installation process.
- User reviews and recommendations: Reading user reviews and recommendations can give you an idea of common challenges and best practices associated with hitch installation. This information can help you avoid potential pitfalls and ensure a successful installation.
Remember, planning ahead, following manufacturer instructions, and utilizing online resources are key to a quick and efficient hitch installation. By being prepared and informed, you can save time and complete the process with confidence. Happy installing!
Troubleshooting Common Issues During Hitch Installation
Installing a hitch can take anywhere from 30 minutes to a few hours, depending on the complexity of the vehicle and any common issues that may arise during the process. Troubleshooting such issues is crucial to ensure a smooth hitch installation experience.
Identifying And Addressing Common Installation Challenges
When it comes to installing a hitch, there are a few common issues that you may encounter along the way. Don’t worry though, we’ve got you covered. In this section, we’ll explore some of these challenges and provide troubleshooting tips to help you overcome them.
So let’s dive in and address these hitches head-on!
Dealing With Compatibility Issues And Finding Solutions
Installing a hitch can get tricky when you run into compatibility issues. But fear not, here are some common problems you might face and the solutions to help get you back on track:
- Vehicle and hitch compatibility: Ensure that your vehicle is compatible with the specific hitch you’ve purchased. Check the hitch’s manual or manufacturer’s website for compatibility guidelines. If there’s a mismatch, you may need to explore alternative hitch options.
- Wiring compatibility: When installing a hitch, you may also need to connect wiring for trailer lights or other electrical components. Ensure that your vehicle’s electrical system is compatible with the wiring kit you’re using. If not, you might need to consult a professional or explore different wiring options.
- Obstacles and obstructions: Sometimes, you might encounter obstacles that hinder the installation process. These could include exhaust components, spare tires, or even structural components of your vehicle. Take your time to carefully navigate and maneuver around these obstacles to complete the installation successfully.
- Incorrect hardware or missing parts: Double-check that you have all the necessary hardware and components before starting the installation. Inspect the contents of your hitch kit and compare them to the installation instructions provided by the manufacturer. If there are incorrect or missing parts, reach out to the manufacturer for replacements.
- Rust and corrosion: Over time, rust and corrosion can affect the integrity and ease of installation for hitches. If you encounter rusted or corroded parts during installation, it’s important to address them promptly. Use appropriate rust removers or seek professional assistance to ensure a smooth and secure hitch installation.
Remember, each installation scenario can vary depending on the specific vehicle and hitch combination. If you’re unsure or facing a unique situation, it’s always recommended to consult a professional for guidance.
Reviewing Hitch Installation Timeframes: Real-Life Examples
Installing a hitch can vary in time depending on multiple factors like vehicle model and expertise level. Real-life examples showcase installation times of 1-3 hours for experienced individuals and potentially longer durations for novices.
Case Studies Of Hitch Installation Timeframes For Various Vehicles
- Compact car: On average, the installation of a standard hitch on a compact car takes around 1-2 hours. The process involves attaching the hitch to the vehicle’s frame and aligning it properly.
- Suv: Installing a hitch on an suv usually requires more time due to the larger size and weight of the vehicle. It typically takes around 2-3 hours to complete the installation.
- Pickup truck: The installation time for a hitch on a pickup truck can vary depending on the truck’s make and model. On average, it takes approximately 1.5-2.5 hours to install a hitch on a pickup truck.
- Van: Vans often have unique frames and configurations, which can affect the installation time. Installing a hitch on a van generally takes about 2-3 hours.
Comparing installation times for different hitch types:
- Class 1 hitch: This type of hitch is designed for lighter loads and smaller vehicles. The installation time for a class 1 hitch is usually quicker, taking around 1-2 hours.
- Class 3 hitch: Class 3 hitches are more heavy-duty and can handle larger loads. As a result, they may take a bit longer to install, typically around 2-3 hours.
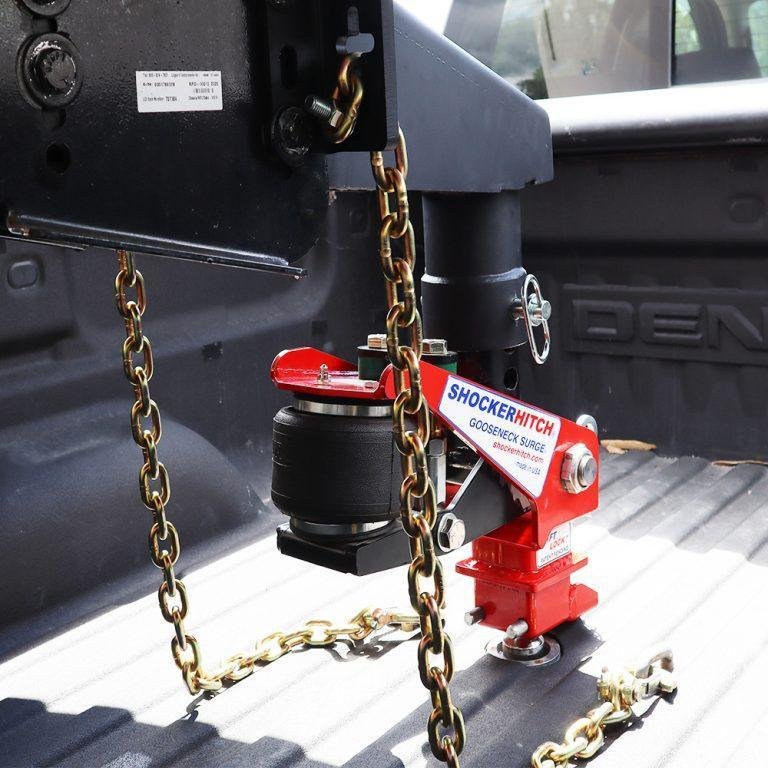
- Fifth-wheel hitch: The installation of a fifth-wheel hitch is more complex compared to other hitch types. It involves mounting the hitch to the bed of a pickup truck and may require additional modifications. As a result, the installation time for a fifth-wheel hitch can range from 3-5 hours.
- Gooseneck hitch: Similar to a fifth-wheel hitch, the installation of a gooseneck hitch involves mounting it to the bed of a pickup truck. The process can take around 2-4 hours, depending on the truck’s configuration.
The installation time for a hitch can vary depending on the vehicle type and the type of hitch being installed. It is important to consider these factors when planning for hitch installation and allocate the appropriate time for the job.
Frequently Asked Questions On How Long Does It Take To Install A Hitch?
Is It Hard To Install Your Own Hitch?
Installing your own hitch is a relatively straightforward process. With proper tools and instructions, it can be done easily. Start by selecting the correct hitch for your vehicle’s make and model. Next, gather the necessary tools: a torque wrench, socket set, and possibly a drill.
Follow the instructions carefully, ensuring you understand each step. Begin by removing any necessary components, such as the bumper or rear fascia. Then, attach the hitch onto the frame using the provided hardware. Tighten all bolts securely according to the specified torque.
Finally, reinstall any removed components and ensure everything is properly aligned. Remember to test your hitch’s functionality before use. With patience and attention to detail, you can successfully install your own hitch with minimal difficulty.
How Long Does It Take To Install A Hitch And Wiring Harness?
The installation time for a hitch and wiring harness can vary, but it generally takes about two to four hours. The actual duration depends on factors like the vehicle make and model, as well as the experience level of the installer.
Professional installers who specialize in hitches and wiring harnesses can typically complete the job more efficiently. They have the necessary tools and expertise to ensure a proper installation. It’s important to note that some vehicles may require additional time for installation due to specific complexities.
To get a more accurate estimation, it’s always recommended to consult with a professional installer who can assess your vehicle and provide an approximate timeframe for the installation process.
How Much Does It Cost To Put A Hitch On A Trailer?
The cost of installing a hitch on a trailer can vary based on several factors. On average, you can expect to pay between $100 and $500 for the installation, including the hitch itself. The actual price depends on the type of hitch you choose, the weight capacity you require, and the complexity of installation.
It is recommended to consult with a professional installer to determine the right hitch for your trailer and get an accurate quote. Keep in mind that additional costs may occur if you need any wiring or brake controller installation. In some cases, trailers may also need modifications to accommodate the hitch, which can affect the overall price.
How Long Does It Take To Hitch A Trailer?
Hitching a trailer generally takes around 10-15 minutes, depending on your experience.
Conclusion
Installing a hitch on your vehicle is a straightforward process that can be completed relatively quickly. The exact time it takes will depend on various factors, such as the type of hitch being installed and the experience of the person doing the installation.
Generally, a hitch installation can be done within a couple of hours, but it’s always recommended to consult with a professional or refer to the manufacturer’s instructions for a more accurate estimate. Remember, it’s essential to take your time and ensure that the hitch is installed correctly, as it plays a crucial role in safely towing trailers and other loads.
By following proper guidelines and using the right tools, you’ll be able to enjoy the benefits of a hitch in no time. So, whether you’re planning a road trip or adding functionality to your vehicle, the investment in a hitch installation is definitely worth it.
Happy towing!